
バックナンバーはこちら。
https://www.simulationroom999.com/blog/model-based-of-minimum-2-backnumber/

はじめに
前回、「Modelicaのソースコードに変数を設置」の効能として
「シミュレーションの試行回数の引き上げ」を説明した。
というわけで今回は
- OpenModelica Connecter Editor上の見え方
- シミュレーション
- パラメータ変更後の再シミュレーション
をやってみる。
登場人物
博識フクロウのフクさん

イラストACにて公開の「kino_k」さんのイラストを使用しています。
https://www.ac-illust.com/main/profile.php?id=iKciwKA9&area=1
エンジニア歴8年の太郎くん

イラストACにて公開の「しのみ」さんのイラストを使用しています。
https://www.ac-illust.com/main/profile.php?id=uCKphAW2&area=1
まずはOpenModelica Connecter Editor上の見え方
Modelicaコードを修正したわけだけど、
それがOpenModelica Connecter Editor上でどのように見えているか確認してみよう。
え?見え方が変わるの?
まぁパラメータに関わるところだけね。
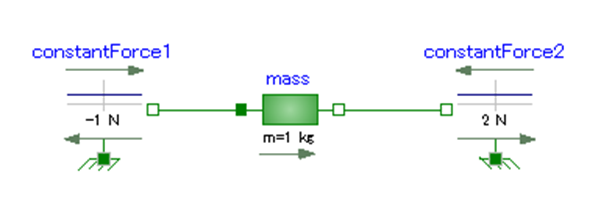
元々の見え方
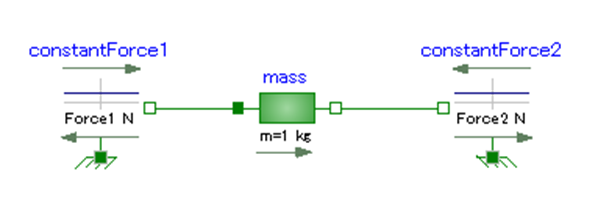
コード修正後
あ、なるほど。
元々の方は即値が入ってたけど、
コード修正後は変数を指定してるから、
その変数名がOpenModelica Connecter Editor上からも見えるってことか。
こういうのが見えるってのは便利だね。
次にシミュレーションしてみる
じゃ、シミュレーションしてみようか。
変数を間に置いたとは言え、初期値は一緒なんで
同じ結果になるはずだけど。
うん。
同じ結果になったね。
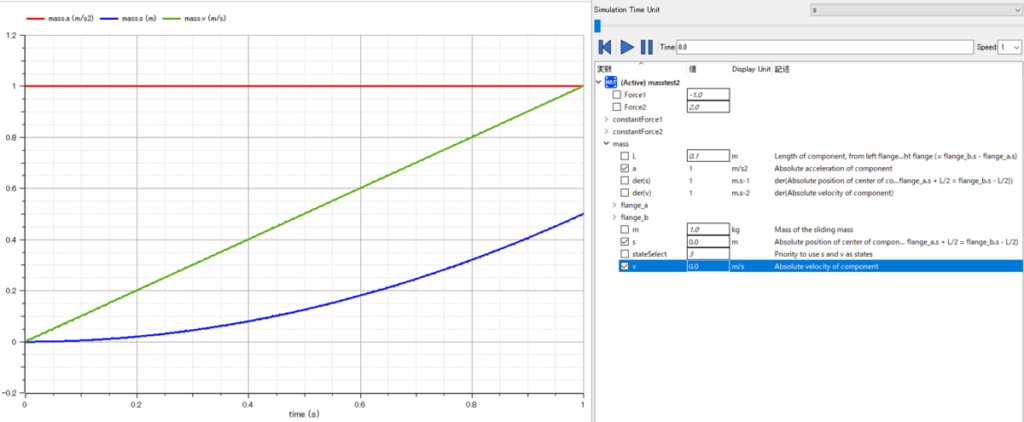
で、ちょっと気になったのが、
変数ブラウザのところに
今回ソースコード上に追加した
Force1とForce2が見えてるね?
もしかして、これって書き換えられるのか?!
その通り。
正解だ。
変数を書き換えてからシミュレーションしてみる。
じゃ、変数ブラウザのForce1を\(-1[N]\)から\(-3[N]\)にして
再シミュレーションのボタンを押してみよう。
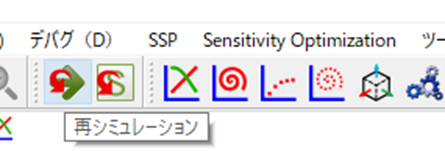
こんな結果になった。
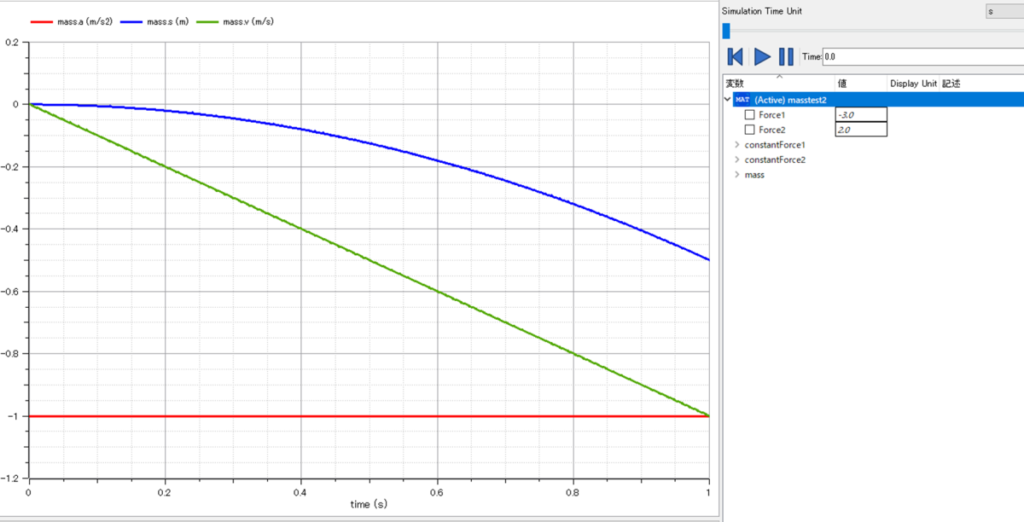
モデルチェック、コンパイルが不要だから
すぐにシミュレーションが出来て結果が見れたね。
これが変数を使った場合の効能か!
こういうちょっとしたテクニックを知ってるだけでいろいろ効率化ができるってことだねー。
なるほどー。
しかも大した手間もかからないし、勉強になったよー。
まとめ
まとめだよ。
- Modelicaコードで変数追加後のOpenModelica Connecter Editor上の見え方確認。
- まずは普通にシミュレーション。
- 変数ブラウザで変数を書き換えたあとに再シミュレーション。
- モデルチェック、コンパイル無しで即シミュレーション結果が得られた。
- ちょっとしたテクニックをしってるだけで効率化可能。
バックナンバーはこちら。


コメント